Bootstrap Navbar Example
Introduction
Despite how complicated and well-thought website organization we develop, it doesn't mean notably if we don't provide the visitor a efficient and simple method accessing it and getting to the specific web page needed fast and with least efforts no matter the screen size of the device showing the web site. If it comes to responsive behavior, the navbar can be set up to collapse under a specific screen width and a screen horizontal depending on how it looks and user sense. Listed below is how:
The best way to use the Bootstrap Navbar Dropdown:
Here is simply what you need to realize just before starting with the navbar:
- Navbars demand a covering .navbar with .navbar-toggleable-* to get responsive collapsing and color pattern classes.
- Navbars and their components are simply fluid by default. Apply extra containers to control their horizontal size.
- Navbars as well as their components are established utilizing flexbox, supplying simple placement options by means of utility classes.
- Navbars are actually responsive by default, but you have the ability to easily modify them to improve that. Responsive behavior accordings to Collapse JavaScript plugin.
- Assure convenience by using a <nav> component or, if applying a more generic component just like a <div>, add a role="navigation" to every Bootstrap Navbar Content to clearly determine it just as a turning point zone for users of assistive technologies.
Due to the fact that the responsive behavior it the quintessence of the Bootstrap framework we'll focus on creating responsive navbars because practically these are the ones we'll mostly demand.
Statin details by doing this the next step in constructing the navbar is creating a <div> element to hold the entire navbar and its items and collapse at the needed display width-- assign it the .collapse class and .navbar-toggleable- ~ the largest screen size where you wish it collapsed ~ for example - .navbar-toggleable-sm
One more detail to consider
A fact to keep in mind is that in the new Bootstrap 4 framework the ways of choicing the placement of the navbar links has been modified a bit in order different forms to be possibly specified to various display dimensions. This gets achieved by the .pull- ~ screen size ~ -left and .pull- ~ screen size ~ -right classes-- assign them to the .nav element to get the preferred alignment in the set size and above it. There also is a .pull- ~ screen size ~ -none clearing the positioning if needed. These all come to upgrade the old Bootstrap 3 .navbar-right and .navbar-left classes which in the new version are no more required.
Keep reading to get an instance and selection of maintained sub-components.
For examples
Sustained information
Navbars included built-in support for a number of sub-components. Choose from the following as required:
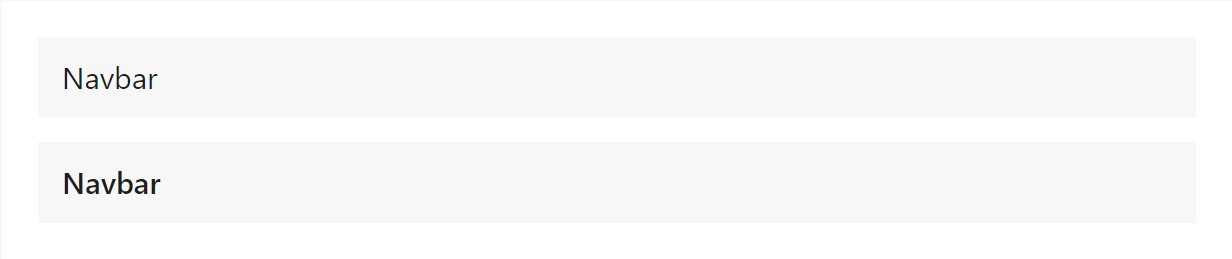
.navbar-brand for your project, company, or product name.
.navbar-nav for a lightweight and full-height navigating ( providing support for dropdowns)..
.navbar-toggler for utilization with collapse plugin and some other navigating toggling activities.
.form-inline for any sort of form controls and also acts.
.navbar-text for including vertically structured strings of text message.
.collapse.navbar-collapse for arranging and disguising navbar components through a parent breakpoint.
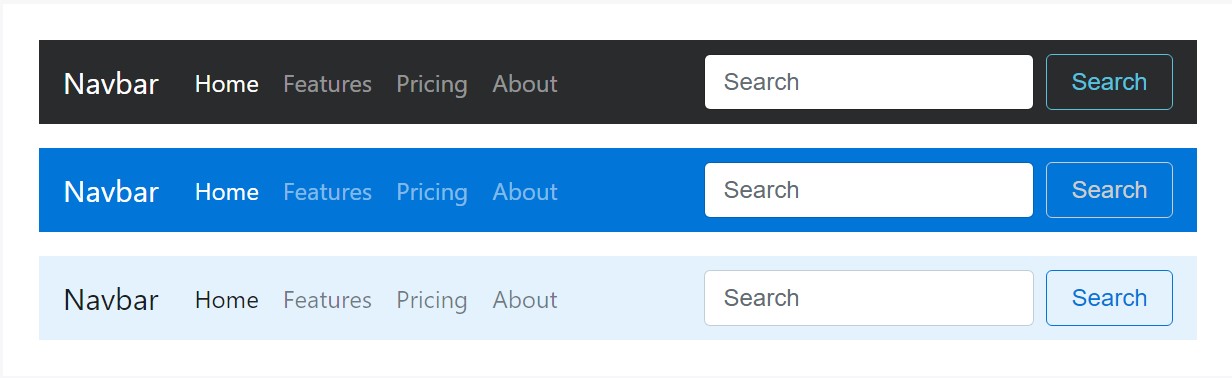
Here's an example of all the sub-components featured within a responsive light-themed navbar which quickly collapses at the md (medium) breakpoint.

<nav class="navbar navbar-toggleable-md navbar-light bg-faded">
  <button class="navbar-toggler navbar-toggler-right" type="button" data-toggle="collapse" data-target="#navbarSupportedContent" aria-controls="navbarSupportedContent" aria-expanded="false" aria-label="Toggle navigation">
    <span class="navbar-toggler-icon"></span>
  </button>
  <a class="navbar-brand" href="#">Navbar</a>

  <div class="collapse navbar-collapse" id="navbarSupportedContent">
    <ul class="navbar-nav mr-auto">
      <li class="nav-item active">
        <a class="nav-link" href="#">Home <span class="sr-only">(current)</span></a>
      </li>
      <li class="nav-item">
        <a class="nav-link" href="#">Link</a>
      </li>
      <li class="nav-item">
        <a class="nav-link disabled" href="#">Disabled</a>
      </li>
    </ul>
    <form class="form-inline my-2 my-lg-0">
      <input class="form-control mr-sm-2" type="text" placeholder="Search">
      <button class="btn btn-outline-success my-2 my-sm-0" type="submit">Search</button>
    </form>
  </div>
</nav>
Label
The .navbar-brand can possibly be applied to almost all elements, still, an anchor gets the job done most ideal as some elements might actually want utility classes or custom looks.
<!-- As a link -->
<nav class="navbar navbar-light bg-faded">
  <a class="navbar-brand" href="#">Navbar</a>
</nav>

<!-- As a heading -->
<nav class="navbar navbar-light bg-faded">
  <h1 class="navbar-brand mb-0">Navbar</h1>
</nav>
Bring in pictures to the .navbar-brand will likely always want custom made designs or utilities to properly dimension. Listed here are various examples to demonstrate.

<!-- Just an image -->
<nav class="navbar navbar-light bg-faded">
  <a class="navbar-brand" href="#">
    <div class="img"><img src="/assets/brand/bootstrap-solid.svg" width="30" height="30" alt=""></div>
  </a>
</nav>
<!-- Image and text -->
<nav class="navbar navbar-light bg-faded">
  <a class="navbar-brand" href="#">
    <div class="img"><img src="/assets/brand/bootstrap-solid.svg" width="30" height="30" class="d-inline-block align-top" alt=""></div>
    Bootstrap
  </a>
</nav>
Nav
Navbar navigation urls set up on .nav opportunities along with their individual modifier class and require utilize toggler classes for proper responsive designing . Site navigation in navbars will likewise increase to take up as much horizontal zone as available to care for your navbar elements securely fixed.
Active forms-- with .active-- to signify the existing page can be used directly to .nav-link-s or their immediate parent .nav-item-s.

<nav class="navbar navbar-toggleable-md navbar-light bg-faded">
  <button class="navbar-toggler navbar-toggler-right" type="button" data-toggle="collapse" data-target="#navbarNav" aria-controls="navbarNav" aria-expanded="false" aria-label="Toggle navigation">
    <span class="navbar-toggler-icon"></span>
  </button>
  <a class="navbar-brand" href="#">Navbar</a>
  <div class="collapse navbar-collapse" id="navbarNav">
    <ul class="navbar-nav">
      <li class="nav-item active">
        <a class="nav-link" href="#">Home <span class="sr-only">(current)</span></a>
      </li>
      <li class="nav-item">
        <a class="nav-link" href="#">Features</a>
      </li>
      <li class="nav-item">
        <a class="nav-link" href="#">Pricing</a>
      </li>
      <li class="nav-item">
        <a class="nav-link disabled" href="#">Disabled</a>
      </li>
    </ul>
  </div>
</nav>
And given that we employ classes for our navs, you can absolutely keep away from the list-based approach totally if you prefer.

<nav class="navbar navbar-toggleable-md navbar-light bg-faded">
  <button class="navbar-toggler navbar-toggler-right" type="button" data-toggle="collapse" data-target="#navbarNavAltMarkup" aria-controls="navbarNavAltMarkup" aria-expanded="false" aria-label="Toggle navigation">
    <span class="navbar-toggler-icon"></span>
  </button>
  <a class="navbar-brand" href="#">Navbar</a>
  <div class="collapse navbar-collapse" id="navbarNavAltMarkup">
    <div class="navbar-nav">
      <a class="nav-item nav-link active" href="#">Home <span class="sr-only">(current)</span></a>
      <a class="nav-item nav-link" href="#">Features</a>
      <a class="nav-item nav-link" href="#">Pricing</a>
      <a class="nav-item nav-link disabled" href="#">Disabled</a>
    </div>
  </div>
</nav>
You can additionally implement dropdowns in your navbar nav. Dropdown menus demand a wrapping element for placing, in this way ensure to use nested and separate components for .nav-item and .nav-link like displayed here.

<nav class="navbar navbar-toggleable-md navbar-light bg-faded">
  <button class="navbar-toggler navbar-toggler-right" type="button" data-toggle="collapse" data-target="#navbarNavDropdown" aria-controls="navbarNavDropdown" aria-expanded="false" aria-label="Toggle navigation">
    <span class="navbar-toggler-icon"></span>
  </button>
  <a class="navbar-brand" href="#">Navbar</a>
  <div class="collapse navbar-collapse" id="navbarNavDropdown">
    <ul class="navbar-nav">
      <li class="nav-item active">
        <a class="nav-link" href="#">Home <span class="sr-only">(current)</span></a>
      </li>
      <li class="nav-item">
        <a class="nav-link" href="#">Features</a>
      </li>
      <li class="nav-item">
        <a class="nav-link" href="#">Pricing</a>
      </li>
      <li class="nav-item dropdown">
        <a class="nav-link dropdown-toggle" href="http://example.com" id="navbarDropdownMenuLink" data-toggle="dropdown" aria-haspopup="true" aria-expanded="false">
          Dropdown link
        </a>
        <div class="dropdown-menu" aria-labelledby="navbarDropdownMenuLink">
          <a class="dropdown-item" href="#">Action</a>
          <a class="dropdown-item" href="#">Another action</a>
          <a class="dropdown-item" href="#">Something else here</a>
        </div>
      </li>
    </ul>
  </div>
</nav>
Forms
Set a variety of form controls and components in a navbar through .form-inline.

<nav class="navbar navbar-light bg-faded">
  <form class="form-inline">
    <input class="form-control mr-sm-2" type="text" placeholder="Search">
    <button class="btn btn-outline-success my-2 my-sm-0" type="submit">Search</button>
  </form>
</nav>
Straighten the contents of your inline forms with utilities as needed.

<nav class="navbar navbar-light bg-faded justify-content-between">
  <a class="navbar-brand">Navbar</a>
  <form class="form-inline">
    <input class="form-control mr-sm-2" type="text" placeholder="Search">
    <button class="btn btn-outline-success my-2 my-sm-0" type="submit">Search</button>
  </form>
</nav>
Input groups operate, too:

<nav class="navbar navbar-light bg-faded">
  <form class="form-inline">
    <div class="input-group">
      <span class="input-group-addon" id="basic-addon1">@</span>
      <input type="text" class="form-control" placeholder="Username" aria-describedby="basic-addon1">
    </div>
  </form>
</nav>
Different buttons are assisted as component of these navbar forms, too. This is also a wonderful reminder that vertical placement utilities may possibly be utilized to line up different sized components.

<nav class="navbar navbar-light bg-faded">
  <form class="form-inline">
    <button class="btn btn-outline-success" type="button">Main button</button>
    <button class="btn btn-sm align-middle btn-outline-secondary" type="button">Smaller button</button>
  </form>
</nav>
Message
Navbars probably have bits of text by using .navbar-text. This particular class changes vertical position and horizontal spacing for strings of content.

<nav class="navbar navbar-light bg-faded">
  <span class="navbar-text">
    Navbar text with an inline element
  </span>
</nav>
Mix up and match-up with some other elements and utilities as required.

<nav class="navbar navbar-toggleable-md navbar-light bg-faded">
  <button class="navbar-toggler navbar-toggler-right" type="button" data-toggle="collapse" data-target="#navbarText" aria-controls="navbarText" aria-expanded="false" aria-label="Toggle navigation">
    <span class="navbar-toggler-icon"></span>
  </button>
  <a class="navbar-brand" href="#">Navbar w/ text</a>
  <div class="collapse navbar-collapse" id="navbarText">
    <ul class="navbar-nav mr-auto">
      <li class="nav-item active">
        <a class="nav-link" href="#">Home <span class="sr-only">(current)</span></a>
      </li>
      <li class="nav-item">
        <a class="nav-link" href="#">Features</a>
      </li>
      <li class="nav-item">
        <a class="nav-link" href="#">Pricing</a>
      </li>
    </ul>
    <span class="navbar-text">
      Navbar text with an inline element
    </span>
  </div>
</nav>
Color arrangement
Theming the navbar has never been definitely much easier with the help of the mix of style classes and background-color utilities. Choose from .navbar-light for usage with light background color schemes , or .navbar-inverse for dark background color options. After that, customise with .bg-* utilities.
<nav class="navbar navbar-inverse bg-inverse">
  <!-- Navbar content -->
</nav>

<nav class="navbar navbar-inverse bg-primary">
  <!-- Navbar content -->
</nav>

<nav class="navbar navbar-light" style="background-color: #e3f2fd;">
  <!-- Navbar content -->
</nav>
Containers
Despite the fact it's not required, you can certainly wrap a navbar in a .container to centralize it on a page or add in one within to simply focus the contents of a fixed or else fixed top navbar.

<div class="container">
  <nav class="navbar navbar-toggleable-md navbar-light bg-faded">
    <a class="navbar-brand" href="#">Navbar</a>
  </nav>
</div>
If the container is inside of your navbar, its horizontal padding is eliminated at breakpoints below your determined
.navbar-toggleable-* class. This ensures we are definitely not doubling up on padding needlessly on lower viewports whenever your navbar is collapsed.

<nav class="navbar navbar-toggleable-md navbar-light bg-faded">
  <div class="container">
    <a class="navbar-brand" href="#">Navbar</a>
  </div>
</nav>
Location
Utilize setting utilities to set navbars inside non-static settings. Go with fixed to the top, attached to the bottom, or else stickied to the top . Notice that position: sticky, utilized for .sticky-top, actually is not entirely supported in each browser.

<nav class="navbar navbar-light bg-faded">
  <a class="navbar-brand" href="#">Full width</a>
</nav>
<nav class="navbar fixed-top navbar-light bg-faded">
  <a class="navbar-brand" href="#">Fixed top</a>
</nav>
<nav class="navbar fixed-bottom navbar-light bg-faded">
  <a class="navbar-brand" href="#">Fixed bottom</a>
</nav>
<nav class="navbar sticky-top navbar-light bg-faded">
  <a class="navbar-brand" href="#">Sticky top</a>
</nav>
Responsive practices
Navbars can certainly employ .navbar-toggler, .navbar-collapse, and also .navbar-toggleable-* classes to change when their information collapses behind a button . In union with some other utilities, you are able to conveniently pick when to display or cover certain components.
Toggler
Navbar togglers can possibly be left or right fixed using .navbar-toggler-left or .navbar-toggler-right modifiers. These are without a doubt installed inside the navbar to prevent intervention with the collapsed state. You can likewise utilize your own styles to set up togglers. Listed below are good examples of various toggle styles.
Without any .navbar-brand shown in lowest breakpoint:

<nav class="navbar navbar-toggleable-md navbar-light bg-faded">
  <button class="navbar-toggler" type="button" data-toggle="collapse" data-target="#navbarTogglerDemo01" aria-controls="navbarTogglerDemo01" aria-expanded="false" aria-label="Toggle navigation">
    <span class="navbar-toggler-icon"></span>
  </button>
  <div class="collapse navbar-collapse" id="navbarTogglerDemo01">
    <a class="navbar-brand" href="#">Hidden brand</a>
    <ul class="navbar-nav mr-auto mt-2 mt-lg-0">
      <li class="nav-item active">
        <a class="nav-link" href="#">Home <span class="sr-only">(current)</span></a>
      </li>
      <li class="nav-item">
        <a class="nav-link" href="#">Link</a>
      </li>
      <li class="nav-item">
        <a class="nav-link disabled" href="#">Disabled</a>
      </li>
    </ul>
    <form class="form-inline my-2 my-lg-0">
      <input class="form-control mr-sm-2" type="text" placeholder="Search">
      <button class="btn btn-outline-success my-2 my-sm-0" type="submit">Search</button>
    </form>
  </div>
</nav>
Together with a trademark name demonstrated on the left and toggler on the right:

<nav class="navbar navbar-toggleable-md navbar-light bg-faded">
  <button class="navbar-toggler navbar-toggler-right" type="button" data-toggle="collapse" data-target="#navbarTogglerDemo02" aria-controls="navbarTogglerDemo02" aria-expanded="false" aria-label="Toggle navigation">
    <span class="navbar-toggler-icon"></span>
  </button>
  <a class="navbar-brand" href="#">Navbar</a>

  <div class="collapse navbar-collapse" id="navbarTogglerDemo02">
    <ul class="navbar-nav mr-auto mt-2 mt-md-0">
      <li class="nav-item active">
        <a class="nav-link" href="#">Home <span class="sr-only">(current)</span></a>
      </li>
      <li class="nav-item">
        <a class="nav-link" href="#">Link</a>
      </li>
      <li class="nav-item">
        <a class="nav-link disabled" href="#">Disabled</a>
      </li>
    </ul>
    <form class="form-inline my-2 my-lg-0">
      <input class="form-control mr-sm-2" type="text" placeholder="Search">
      <button class="btn btn-outline-success my-2 my-sm-0" type="submit">Search</button>
    </form>
  </div>
</nav>
External content
Occasionally you want to use the collapse plugin to activate covert subject someplace else on the webpage. Given that plugin deals with the id and data-target matching, that is really effortlessly performed!

<div class="pos-f-t">
  <div class="collapse" id="navbarToggleExternalContent">
    <div class="bg-inverse p-4">
      <h4 class="text-white">Collapsed content</h4>
      <span class="text-muted">Toggleable via the navbar brand.</span>
    </div>
  </div>
  <nav class="navbar navbar-inverse bg-inverse">
    <button class="navbar-toggler" type="button" data-toggle="collapse" data-target="#navbarToggleExternalContent" aria-controls="navbarToggleExternalContent" aria-expanded="false" aria-label="Toggle navigation">
      <span class="navbar-toggler-icon"></span>
    </button>
  </nav>
</div>
Final thoughts
Thus essentially these are the way a navbar need to be constructed in Bootstrap 4 and the new neat modifications coming with the newest version. What's left for you is thinking of as cool page structure and web content.
Examine a couple of online video training relating to Bootstrap Navbar:
Connected topics:
Bootstrap Navbar official records

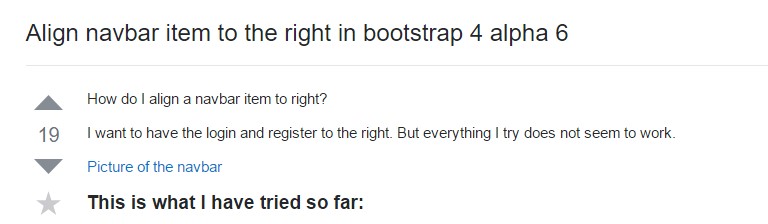
Line up navbar thing to the right within Bootstrap 4 alpha 6
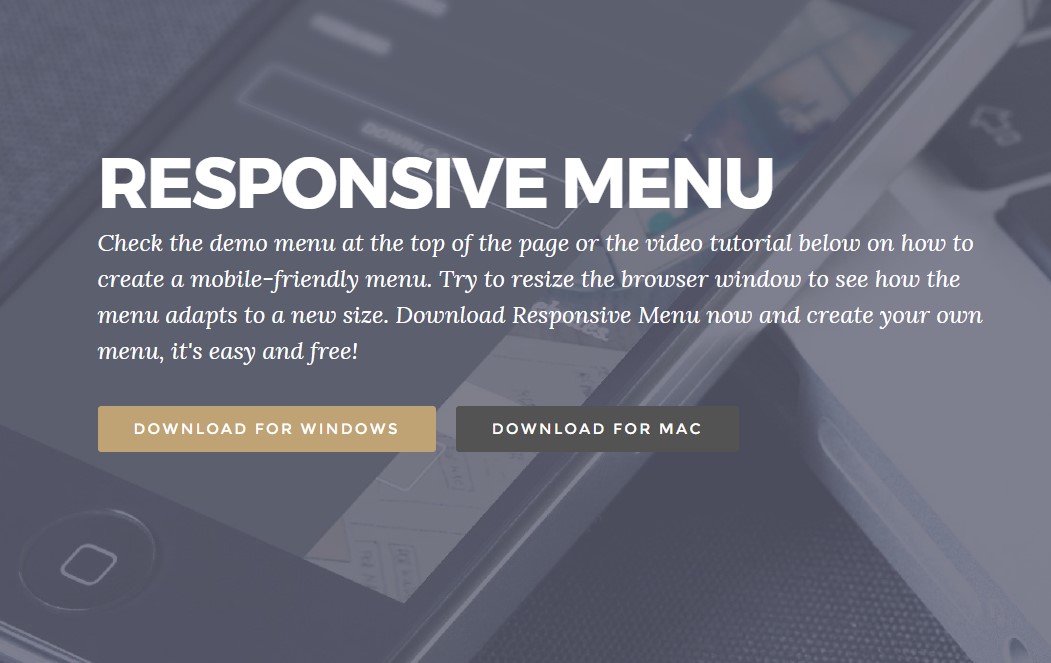
Bootstrap Responsive menu within Mobirise
Free Bootstrap Accordion Menu Compilation
jQuery Bootstrap Responsive Menu Templates